Friday, July 26, 2013

Using Google Maps to Visualize Bus Routes

One of the most difficult things to understand when you walk into a district as Superintendent is bus routes. Most likely, you do not have a solid understanding of the roads in your district nor do you know where families live. It took me a year of confusion before I decided to create a google map of all our bus routes to provide the visual I need to gain understanding.

Now pending on your district size, this could take some time but it’s also something you can train an assistant to do. Here is what I did. Since I have the new version of Google Maps, you need to go to the Settings gear in the top right corner and click “My Places”.

From there, you will want to create a map. Click the big red button that says “Create Map”.


Give it a title and you can begin to start place your placemarks on your map.

Select the blue placemark and drop it on the map at the bus stop location. From there, you can select a different icon in the top right corner if you would like. I have different colors for each route. Give a title to your placemark. I recommend you don’t use student names. From there, in the “Description” box, you can add other information that is relevant to your map. Press OK when you are done with editing.


When you are done placing all placemarks in your map, you should have a nice view of all your stops and routes. You can use the line tool to create lines for your routes or geographic regions. I’m not that fancy with my routes. Below you can see what an example map looks like.

There are lots of fun things you can do in Google Maps (and Earth). This is only one administrative idea for folks to use.

Friday, July 12, 2013

IFTTT - One of the best tools on the web!

Since I’m on my way to the California Google Summit and I’m currently 10,000 feet in the air, I thought I would write about one of my favorites tools on the web. The tool is IFTTT.com (If This Then That).


Technology is wonderful and for the most part I’m pretty savvy. I use many different tools on a daily basis and try to reduce duplication as much as possible. For instance, I want to write a blogpost and have it automatically tweet out, post to facebook, and possibly email a mailing list. Now, I know that I can manually do all of these items but I want automation to make life a bit less cluttered.


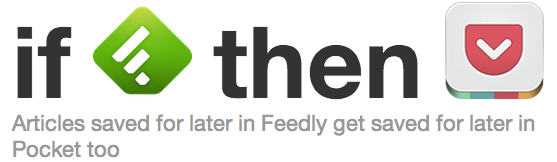
Sometimes, I want to something difficult but realize I don’t have the time nor the technology expertise to pull it off. Luckily, the service IFTTT provides that bridge for average tech users to the world of automation. IFTTT uses recipes (just like what you have in your kitchen except replace food with tech), to help users automate workflow. Here is an example:


This recipe is simply taking articles from my RSS reader (Feedly) and saving them automatically to Pocket. All I needed to do is authorize both services to allow IFTTT to work it’s magic.


IFTTT has thousands of recipes for you to search and select but you can also use your imagination to pull off some custom workflow that meets your needs. I may want to choose to post a tweet of any photo that I like on instagram. Very easy to walk through the steps and create the automation.


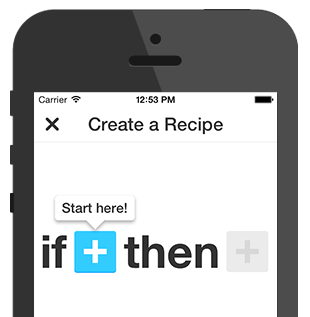
IFTTT also has just released a new iOS app which allows you to create recipes specifically for your iPhone.  


Here are some of my favorite recipes on IFTTT:
  • If I tag an article in Feedly with a specific tag, then post to Twitter
  • If I upload new photos to instagram, then upload to Flickr
  • If I create a new blogpost, then tweet the link on Twitter
  • If I upload a photo on facebook, then upload it to Picasa Web Albums (Google+)
  • If I text a specific number, then I will receive a call to allow me to escape (Text to Escape Recipe)

Ok, that last one is just for fun but it could be useful as well. Have fun with this site! One of my favorites!

Sunday, January 20, 2013

Drive Paperless Board Meetings

Ok, so I spend a lot of time when I hear of products on the market that do simple services and think “how can Google do that?”. One of most recent items has been companies marketing their “wireless board meeting” software. Board meetings are more than just a simple agenda, superintendents and their board secretary spend considerable amount of time preparing exhibits to go with many of the agenda items. Small districts, like Andrew, have board packets that consist of at least 30 pages every month. Other districts that are considerably larger may range from 70-100 pages of meeting information. Often times it just depends on what the agenda items consist of and the amount of items for the meeting.

Rather than spend money on an online service for going wireless in board meetings, we simply use Google Drive instead. I have been planning this since before Christmas but just implemented it for the first time in January. Here is what I did to pull it off.

The first step is to create a folder in your google drive and title it “Board of Education”. Once you have done that, simply change the sharing settings to “Anyone with the link”. You need to make sure you complete that setting because for each meeting you will create a sub folder. All of these sub folders will inherit the settings of the parent folder. This will save you some time and the mistake of not making the folder available for others.

My board secretary and I work on the agenda in a google doc. Normally this process starts shortly after the most recent board meeting ends. Once we finalize the agenda, my secretary drags it into the appropriate meeting folder. We then start placing PDF files of our exhibits into the folder to complete the packet. We make sure to name the files so they are easily accessible by board members. For example, we will title one document “Exhibit V - Bathroom Renovation Bids”. By being consistent in the naming, you will make it very easy for board members to access the documents.

Once the packet is complete, we share the folder directly to board members. This will give them an email notice of the packet, and make it available for them to easily access via the Google Drive app on their iPad. They can access the documents from any device, which is the beauty of doing it through Drive. We have iPads for our board so that’s how they access it.  You can email the link of the folder to staff, media, and post on your website.

Is this the most innovative use of Drive? Nope. It is very practical though. Some of these services for purchase on wireless meetings can range from $500 to $1500 per year. To me, that’s an unneeded expense.

A few things to think about....

Closed session meetings - IF you use Drive for distribution of confidential documents, be extremely careful you do not share with the public!

Space - You have 5 GB of space in your Drive account for files you upload. I’m guessing you may want to consider an upgrade for a few dollars a month.

Access - Make sure that the appropriate people have editing access to your folder and everyone else simply has viewing access.

Ease in to it - Our board is getting both digital and paper packets for the next five months. After that, we will transition to digital packets only. During that time, we will have our student tech helpers provide them with assistance to help them get the feel of using Google Drive.

If you are at FETC next week, I’ll do a short demo of this in my “Walk the Talk” session. Not going to be there but want to learn more? Let me know and we can schedule a Google Hangout!

Monday, November 19, 2012

Using Forms to Automate Your Workflow

I think it’s time to start utilizing my blog a bit more, especially for sharing resources for presentations at conferences. This week, I spent three days at the Midwest Google Summit in the Wisconsin Dells. This is the second year of the conference and is super learning opportunity for educators. Between the fun activities set up and the all star lineup of speakers, it’s no wonder this conference has sold out the past few years.

My focus for this post is to share the Google Forms resources that I model in my Google Apps for Admin session. At Andrew CSD, we have automated many processes that save a bunch of headaches for staff. Here are the templates many of you have requested:

Leave Request
Transportation Request
Purchase Order Request
Teacher Candidate Reference 

Student Discipline Form
Here is how you can use these forms in your district. First, click “use this template” to download the file into your Google Drive. Once downloaded, you can make any edits that make the form your own. It is afterall, a template. Edits are welcome. Once you finished the form, make sure you select whether you want folks to sign in and if you will be collecting their username automatically.

The next step is to install a script to process your data and communicate with the appropriate people. I like the script FormEmailer but there are a few others out there that other folks like as well. For me, FormEmailer works great so I’m sticking with it. Click on the FormEmailer link to get step by step instructions to help you out.

Don’t forget the last step, go to Tools and then down to Notification Rules. Select how often you would like to be notified when your spreadsheet receives new data. This way you don’t have to log in to Google Drive to check if a leave request has been submitted or if your reference checks have been returned. I have all of my forms set to notify once a day in a digest format via email.

I’m thinking of hosting some Google Hangouts on the Air for school leaders as I give them some tips and tricks on how they can model and use technology everyday in their profession. Let me know on Twitter what you think!